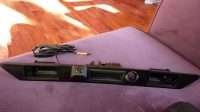
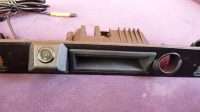
Found an OEM replica camera set up for $46 with camera included. Will install it later after testing the quality of the camera.
- OEM replica A8
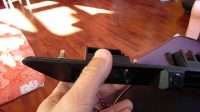
- Handle and Camera
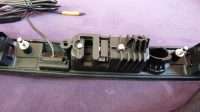
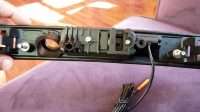
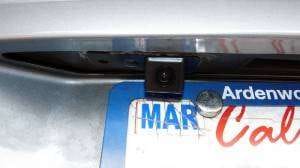
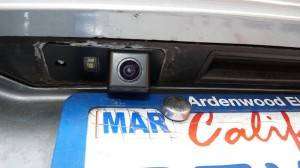
- A8 D3 OEM replica camera and handle back side
- A8 D3 OEM replica camera and handle back side
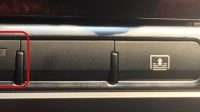
- A8 D3 OEM replica camera and handle screw
2014-06-21 Found a new camera for $19 – Great angle – Image and the LED prongs fit the original wiring.
2013-07-21 For those who wants to know if you have the head unit with FBAS or NOT, don’t need to remove the glove box, just remove the CD changer and you can see the MMI 4E0 035 729 shiny box in the back. Look for the green connector.
2013-06-19 Love to park with the RVC
2013-06-07 OK – For MMI 2G systems – 2004-2010 – 3 important things needed to get the camera to MMI screen are – 4EO 910 441 – 4EO 035 729 “A” – 4LO 907 468 “B” or “C” or 4EO 907 468 “G” or “H”. Before anyone does anything – we need to find out what we have in our cars first –
MMI Software version MUST BE 4140 (my 08 Q7) or 4610 (latest) – Update software to 3360 or 4610.
1. Back up sensors (front and back with beeping sound) + Graphical display (4E0 919 283 C – on top of the DVD navigation). If we don’t have these, I believe we can still install back up camera, just no sensors.
2. MMI head unit must have FBAS circuit installed – the letter “A” at the end of the box 4E0 035 729 and the green Fakra connector is needed for camera retrofit – We can buy a used one with the “A” or add the circuit ourselves if we are good with the soldering iron. The benefit of doing this is “Component Protection” will not come up and we don’t have to take the car to the dealer to remove (software) – it does cost money.
3. We definitely need the 4E0 910 441 – Rear View Camera Controller – this one will take the video from the camera and send to the FBAS in the head unit to display on the MMI screen.
4. The last and important piece is the CAN BUS GATEWAY – 4LO 907 468 B – (“4LO” not “4EO”, and if you find 4EO make sure it’s 4EO 907 468 G or H) – Now if you have ACC (Adaptive Cruise Control) then you need (4LO 907 468 C or newer and definitely 4EO 907 468 H – again please check the forum – mine doesn’t have it so I can’t vow for this, but audiworld (JohnnyQ) did it – ask him). The correct versions will have the RVC option and 6C in the VCDS to configure the RVC (Rear view camera).
5. Camera and 5M Fakra E cable – I use Sony CCD camera – cheap but works fine – You can spend $400 for the whole used set original – for after market camera RCA connector + Fakra Z is needed.
2013-05-08 It works!!!
Sony CCD Camera – very clear although not very good at night – it fits perfectly in the license plate light holder – the LED light is bright but the terminals are reversed – We have to retrofit with LEDs any how, that’s is also another project. This one also has guide lines which not needed with Audi system.
2013-05-07 I waited for 3 weeks for the “F” to come and it doesn’t support RVC – So, whoever said it did, was extremely irresponsible. Cost me time and $103. I ordered another one but this one is 4L0 907 468 B which I know it supports RVC because it’s used in my Q7.
Back up cameras are so popular these days, even Honda Accord has one as a standard equipment, but with Audi A8, they don’t offer back up cameras until 2007. All 04-06 must be retrofitted with back up camera system if we want one. I don’t believe dealers even offer to retrofit one for these A8. I bought an 06 A8L because it’s $6-7k cheaper than comparable 07, therefore I have to install back up camera for our A8L.
After doing some research about the system and input from different Audi forums, I have some ideas what need to be done to have my camera installed. Well, first thing is to check if I have all devices that support RVC (Rear View Camera).
This is the block diagram from Rear View Camera System on Audi cars. Depends upon the year and options of our cars, a certain parts need to be modified or added. For 2006 that has parktronic system installed, we should have graphics display on the MMI screen which we already have the can bus installed 4EO 907 468 B – For my Audi A8 – The Hard ware version must be “F” (I got the “F” and it doesn’t support RVC- ) or newer – The current one I have in my car is “E”. The MMI control box (head unit) 4EO 035 729 doesn’t have the video circuit like the 4EO 035 729 A, which we have to add or replace with one. The benefit of adding the circuit is to avoid “Component Protection” which we need to take the car to the dealer to get it done if we used a different 4EO 035 729 “A”. The only component we need to add to the system is the camera controller box 4EO 910 441. The camera will go to this controller box and 1 video output will go from here to the modified 4EO 035 729 “A”. We need VCDS to turn on the camera option and everything should works.
Since I didn’t have all the devices ready – my project is already 3 weeks old – due to finding out things I need as I go along: 04-05 don’t have 4E0 919 283 C – the Graphical Display – I don’t think you need it if you want to install RVC – but if you want the overlaying between the graphical display and camera view, then install it. It’s standard on 06’s.
Must have for any Audi MMI system to work with RVC.
1. MMI head unit = 4E0 907 729 A (FBAS circuit populated) or 4E0 910 731 or 732 (newer version). This one best is to modify the existing unit in the car like I’ve it done.
2. 19-Can Bus Controller 4E0 907 468 F or G? or H? (it’s on ordered) – wrong one – 4L0 907 468 B is the one. When we replace the GATEWAY, we need to use VCDS to configure the Gateway to see Rear View Camera 6C option. Follow the video below – Make sure the screen capture all the options we have on our cars because if not all checked – we will have errors coding it.
Original installed list from my 06 A8L.
***The TPMS on A8 is 65 system I and Q7 is 4C Tire Pressure II***
3. Camera controller 4E0 910 441.
Since the connector wires cost $10 a wire, and I don’t believe I’m going to remove this box for a long time. I did solder them directly to the pins.
4. Parktronic Graphical Display 4E0 919 283 C – to me it’s an option if you want the graphical display overlay over the camera images.
We need to tap into the CAN BUS for the Camera Controller, the best way is to tap into the CAN BUS wires of the Parktronic Graphical Display. The CAN HIGH is Green/Orange wire and CAN LOW is the Brown/Orange (all Brown color wires are LOW = ground).
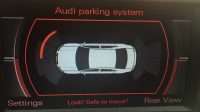
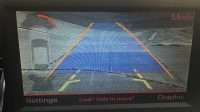
Before putting everything together, make sure the RVC controller is integrated with the parking system. The first thing we can check is turn on the engine, push the Parking Sensor button on the dash, the graphical will show up and on the lower right corner, we should have “Rear View” option. If it’s not there, then the RVC controller is not recognized by the parking system, you won’t see the camera video at all.
5. Running Fakra “E” (green) 5M = 15ft from the trunk to the front Head unit 4E0 035 729 “A”.
Use a plastic guide like plastic sword to poke from the trunk through the front seat along the body – NOT to damage the seat –
Tape the Fakra connector to the tip of the sword and guide it through the front along the body – NOT to damage the seat –
Tuck the cable under the plastic guide on the side while pulling it toward the front –
AFTER MARKET SONY CCD CAMERA INSTALLATION
will continue





28 Comments
Hello I have one question.
I have tv tuner with fbas is it possible to connect the cable there not to put new one?
If you FBAS already, all you need is the RVC controller module and the new CAN controller that supports RVC and Fakra connector cable from RVC controller to the FBAS. Connect the TV tuner to the RVC controller. Read the post.