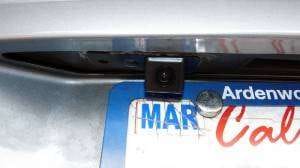
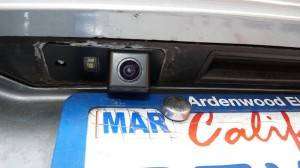
2014-06-21 Found a new camera for $19 – Great angle – Image and the LED prongs fit the original wiring.
Install rear view camera needs some design and preparation – If I want to spend more money to get the original camera and the license plate holder, it may be a little easier, but it will cost a bundle of money – Regardless of what we want to do – wiring the trunk and camera does need some design.
REMOVE THE TRUNK TRIM
The trunk trip is mounted to the trunk metal lid with clips along the trunk rim, but before we un-clip these clips, we need to remove a few components first.
Remove the tool box (4 screws – remove the covers first).
Remove the handle by pry the florescent cover and torx
Pop the rubber cover of the trunk latch out or if you pull the trim off, it will come out with it.
Now start popping out the clips along the trim, start with the top corner first until they all pop out, you can remove the lights connector.
The goal is to run the wiring from the trunk lid – license plate holder where the lights and trunk latch reside – to the trunk itself = interior of the car.
CAMERA WIRING
It doesn’t matter what kind of camera you’re going to install, we need to run the wire from the trunk lid to the trunk body. The OEM camera may be less troublesome than the after market, but the procedure should be the same.
Some cars may have the grommets on both sides of the trunk, but mine only has the passenger and not the driver side. The part number is 4E0-971-876-B or you can verify the number with the one on the passenger side – it’s $38 at the dealer or some online part stores sells for $24.
Since we’re going to use quite a few wires from the trunk to the lid, I found a computer RS232 (serial) cable that bundles about 6 wires in it, and it’s small and easy to run through the trunk grommet.
Remove the driver side light assembly– 10 mm socket needed – be careful not to drop the nuts inside the trunk panel.
Slide the light assembly out – notice the guide/lock pin
Run Wire Bundle – Punch a small hole through the existing grommet of the light wiring to run the wire bundle from the trunk to the trunk lid.
Snap the sleeve to the hinge of the trunk – it will snap in nicely
Now pull the cable through the trunk lid access cut out.
After market Sony CCD camera installation
Now, we have cable connecting the lid to the trunk where all electronic devices will be. Now we’re mounting the after market camera – Sony CCD will provide good image for our MMI – $20 free shipping. This camera is mounted on the left license plate light, it fits very well, but we need to drill a big hole to run the wires through. Before we install the camera, test it outside before installing it in the car. This particular Sony CCD camera has LED light polarity REVERSED – so test yours before installing it. We tape the connection to avoid short circuit. It requires 12V, so we need to power it through the back up light wire (splice it).
Now we need to hook up the LEDs license plate lights.
For the license plate lights to turn on at all with LED bulbs, we need to put a ptc in parallel with the bulbs. There are red/blue wires inside the trunk lid which we can splice it to the new led bulb on the camera, this one will take care of the right side led bulb also.
Connect the LED wires + to RED and – to Blue using the original license plate wiring connection – Make sure to add a PTC between these 2 RED & BLUE terminal for the LED to work with the lighting system.
The other side license plate LED can be bought here. License plate LED doesn’t throw warning light, but the system won’t turn them on and error code will be recorded in module 46.
*** When everything is mounted and working well, I used some clear silicon glue to seal all the camera joints to make sure there’s no moisture can get into the CCD. Wiped off the lens clean from silicon smear. It’s been working for a few months now, no problems even when the weather rains or shines.


2 Comments
If you used a 12-volt camera and spliced it to the reverse light wires, what did you do with the 6-volt wires coming from the audi backup-camera controller? Did you just not used those pins?
Gus,
I just splice the 12V from the back up light in the trunk lid. A little delay but it works quite well.